Part 1, Before the Shoot
“To err is human”, is a common phrase. In the operating room mistakes can be very costly and have severe consequences for the patient. In order to decrease the risk of errors, every operating room goes through a process known as the “ time out” prior to the start of each case. Everyone stops what they are doing while the nurse identifies the patient, the proposed procedure, that the appropriate area is prepped, and that the required instruments are available. Each individual must verbalize agreement before the procedure can begin. While photographic mistakes don’t have quite the same consequences as mistakes in the OR, they can still ruin your day. I once drove two hours at four in the morning to catch a sunrise, only to arrive at my destination and find I forgot my cable release. Not a huge mistake but the quality of the photos I took that morning suffered as a result. Taking “Time Out” beforehand would have prevented the problem all together.
Unlike an OR time-out, the photographic time-out needs to take place at several different times. Here is one possible detailed before-the-photo session “Time Out” checklist for wildlife photographers.
The before-the-shoot checklist
When photographing wildlife, it’s important to know the weather conditions for the specific location and time of day you’ll be shooting. If you can only do one thing to ensure your wildlife photography session will be successful before you go, check the weather forecast for the day on which you plan to photograph. Nothing can ruin a trip faster and make you feel more miserable than bad weather. Checking the weather can help you plan your shots and prepare for any changes in conditions. Note the wind direction, as well as sunrise and sunset times. To get the most accurate and up-to-date weather information, it’s a good idea to use multiple sources., there are several ways to check the weather forecast for the area where you intend to photograph. Start by checking the local weather service website. The National Weather Service website provides accurate and up-to-date weather forecasts for specific regions. The site is free and can provide you with detailed information on temperature, precipitation, wind speed, and other weather-related factors. In addition, there are many free weather apps available for smartphones and tablets that can provide detailed weather forecasts for specific locations. Some of the most popular weather apps include AccuWeather, The Weather Channel, and Weather Underground. Many news websites and weather service websites provide weather maps that show current weather conditions and future forecasts for a specific area. These maps can be useful for getting a quick overview of the weather conditions in the area you’ll be photographing. By using these methods, you can avoid the weather wiping out your entire trip.
After the weather, nothing can lay waste to a photo session quicker than forgetting a battery or memory card. It’s essential to ensure that all your camera gear is in working order and fully charged or have spare batteries and memory cards. Clean the camera sensor and lenses. Dirt and dust on your camera’s sensor and lenses can affect image quality, so clean them thoroughly before a shoot. Use a blower to remove dust and dirt from the sensor, and clean the lenses with a microfiber cloth.
Be sure to pack your camera gear well. When packing camera gear for a wildlife shoot, there are a few things to keep in mind to ensure that your equipment is well-protected and easily accessible. Here are some tips to help you pack. Choose a bag that is designed specifically for camera gear and provides adequate protection for your equipment. Look for a bag with padded dividers, weather-resistant materials, and adjustable straps for comfortable carrying. Prioritize essential gear. Pack your essential gear first, such as your camera body, lenses, and extra batteries. This will ensure that you have the necessary equipment for your shoot. Pack for the conditions. Consider the conditions you’ll be shooting in and pack accordingly. For example, if you’ll be shooting in a dusty environment, bring a blower brush and lens cleaning kit. If you’ll be shooting in wet conditions, bring rain covers for your camera and lenses. Use protective covers for your lenses and camera body to prevent damage from scratches or dust. You can use lens caps, camera body caps, and lens pouches to keep your equipment safe. Organize your gear in a way that makes sense to you. You might want to group your lenses by focal length, for example, or keep your extra batteries and memory cards in a separate compartment for easy access. Be aware of the weight and balance of your bag and make adjustments as necessary. You may need to redistribute the weight of your gear to make it more comfortable to carry. You really don’t want to arrive at your destination and find that an essential piece of gear is broken and nonfunctioning because you packed it wrong.
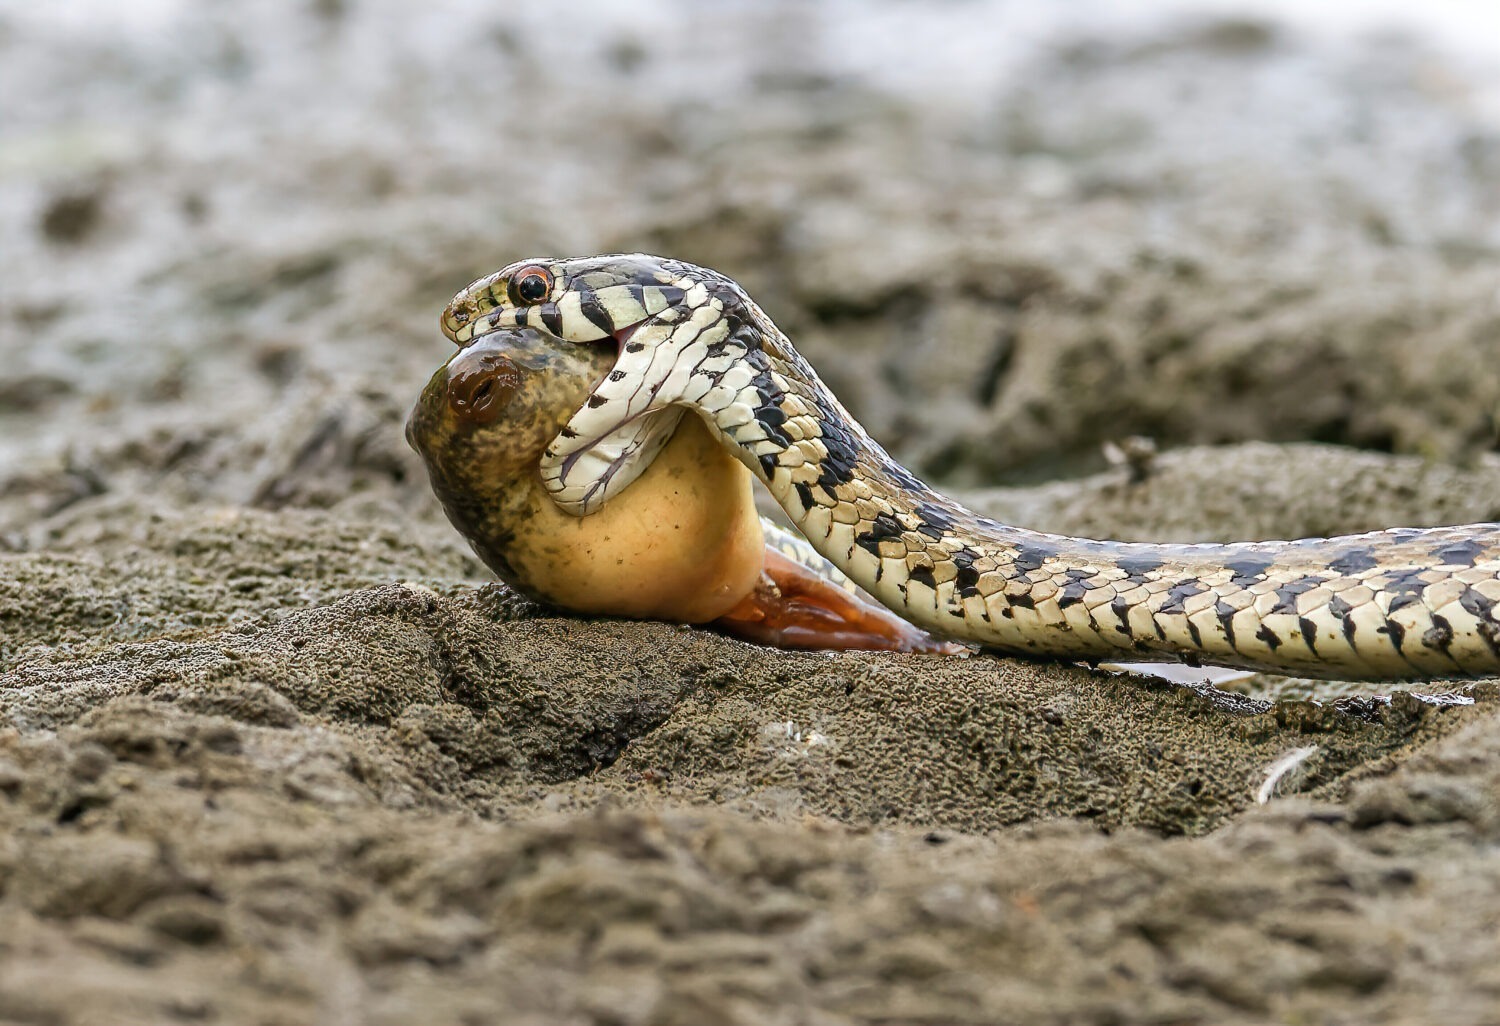
Take time out to research your destination. It sounds simple but research is an important part of wildlife photography. There is no way you can photograph a polar bear in Texas. Understanding the behavior and habitat of the animals you plan to photograph can help you capture better photos. You can start your research by reading a book. There are many books available on various species of wildlife, which can provide detailed information on their behavior, habitat, and other important factors. Look for books written by reputable authors or experts in the field. If you’re lazy like me, you can watch documentaries. Documentaries can be a great way to learn about wildlife and its behavior. Look for documentaries produced by reputable sources, such as the BBC or National Geographic. You can visit local wildlife reserves or parks. Visiting local wildlife reserves or parks can provide you with firsthand experience of the animals and their environment. It can also give you the opportunity to speak with park rangers or other experts who can provide valuable information. There are many online resources available for researching wildlife, such as animal conservation organizations, academic websites, and online forums. Look for reputable sources of information and be sure to cross-reference your findings. Join a wildlife photography group. Joining a wildlife photography group or club can provide you with access to experienced photographers who can share their knowledge and expertise. It can also provide you with opportunities to photograph wildlife in a group setting. By using these methods, you can gain a better understanding of your subject and be better prepared to capture stunning wildlife photos. Remember to always prioritize the safety and well-being of the animals, and be respectful of their natural environment. Doing your research beforehand and prevent you from trying to photograph animal species that simply aren’t native to the location you have chosen.
Next, decide on the location and timing of your photo session, considering the light conditions and the animal activity. Consider hiring a local guide who can provide you with expert knowledge of the area and help you find the best spots to photograph wildlife. A guide may also be able to provide valuable insights into the lighting conditions and typical animal activity in the area.
Before you head out to photograph wildlife in a particular area, it’s important to ensure that you have the necessary permits and permissions to do so. In the past several years, due to the increased number of visitors, National Parkes such as Rocky Mountains National Park and Mount Evans require reservations to be admitted. No reservation, no admittance. To make certain you can get in, you should check if you need reservations before you leave. You should also check if you need any permits or permissions to photograph wildlife in the area you have chosen. Contact local authorities, such as park rangers or wildlife officers, to find out if permits or permission are needed to photograph wildlife in the area. They can provide you with information on the specific permits required and how to obtain them. Many wildlife reserves or parks have websites that provide information on permits and permissions required for photography. If the area you plan to visit is managed by a specific organization, such as a wildlife conservation group, contact them directly. If you’re not sure whether permits or permission are required, ask locals who are familiar with the area. They may be able to provide valuable insights into the rules and regulations around wildlife photography in the area. It’s important to follow all rules and regulations around wildlife photography to ensure the safety of the animals and their natural habitat. By checking before you go, you can avoid any legal issues and ensure that you are being a responsible photographer.
Continuing down our checklist, It’s a good idea to notify someone about the location and duration of your photo session in case of emergencies. No one plans to have a problem, but if there is an emergency or accident, someone should know where you are and when you are expected to return. This will help ensure that help can be sent to you quickly and efficiently. Letting someone know about your plans and the expected duration of your photo session creates an additional level of accountability. In case you don’t return when you’re supposed to, someone will be aware that you may need help. Letting someone know about your photo session can give you peace of mind knowing that someone is aware of your plans and location. This can be especially important if you’re going out alone or into a remote area. If you fail to return, a search and rescue effort can be initiated more quickly if someone knows your intended location and expected return time. This can save valuable time and increase the chances of a successful search and rescue operation. It makes sense and can save your life.
Not having gloves when the weather is freezing can make a wildlife photo shoot miserable if not impossible. Therefore, ensure that you have appropriate clothing, footwear, and protection from sun, rain, or cold. Dressing in layers is the best way to prepare for changing weather conditions. Wear a base layer that wicks moisture away from your skin, a mid-layer for insulation, and a top layer for protection from wind and rain. Choose sturdy footwear with good traction that will keep your feet dry and protect them from rocks, mud, and other hazards. If you’ll be spending time in the sun, wear a hat with a brim to protect your face and neck from the sun. Apply sunscreen with an SPF of at least 30 to exposed skin and wear sunglasses to protect your eyes. Even if the forecast calls for sunny weather, it’s always a good idea to bring rain gear, such as a rain jacket and pants, just in case. If you’ll be in an area with mosquitoes or other biting insects, bring insect repellent to protect yourself from bites. By taking these steps, you can ensure that you’re well-prepared for your wildlife photography outing and can focus on capturing stunning photos without worrying about your comfort or safety.
The pre-shoot planning is over. We have used our ” Time Out” to confirm that everything is in place for a successful wildlife shoot. Now it’s time to head out into the field and start taking photos. In part two of our series, we will explore the elements of a “Time Out” that takes place while we are shooting to guarantee the photos we capture will be extraordinary.