When I first decided to take the plunge and switch to a mirrorless camera for my wildlife photography, I was a bit hesitant. I had been completely satisfied with my Nikon D500 and thought it was one of the best wildlife cameras I had ever owned. The thought of relearning a new camera gave me some pause. After purchasing and using my Nikon Z9, I realized very quickly that this camera was either going to be an unruly beast or a tireless companion, depending entirely on how I set it up. Over time, I realized the difference between missed opportunities and photographs worth framing, time and time again, came down to just how intuitive I could make my use of the Z9 in the field.
There’s no such thing as a perfect recipe, but after hours of trying different settings and configurations, one tried-and-true combination has evolved for me. One that consistently puts my focus on the animal, where it should be, not on the camera. Let me share, from my practical experience as an amateur wildlife photographer like you, the setup that has made using the Z9 second nature to me when shooting wildlife.
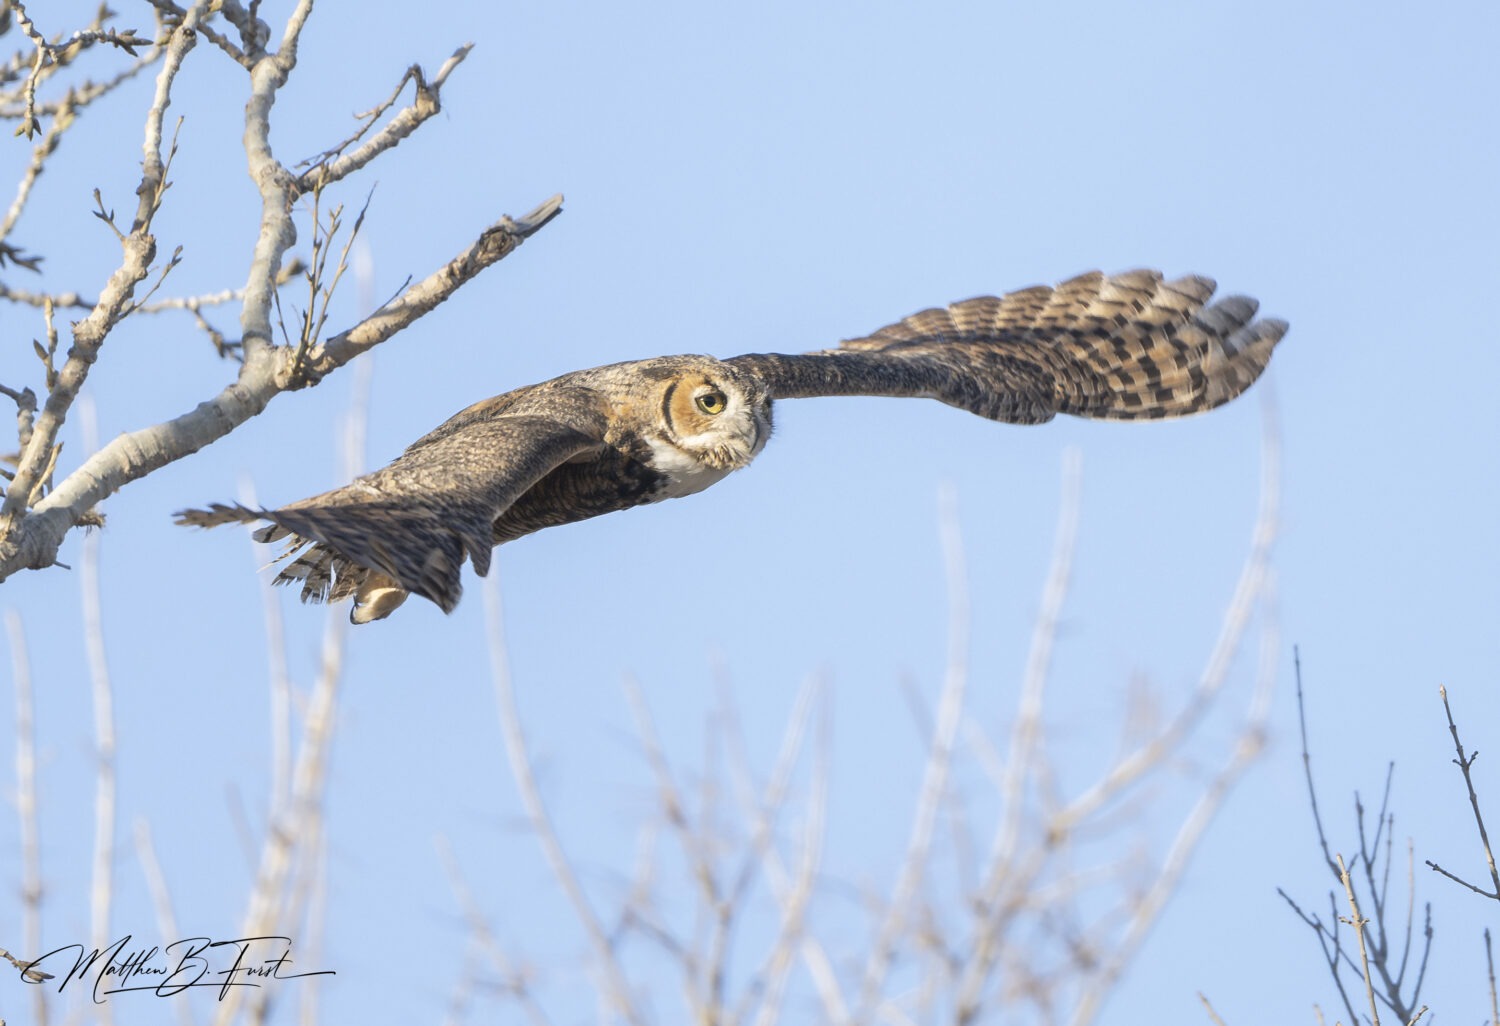
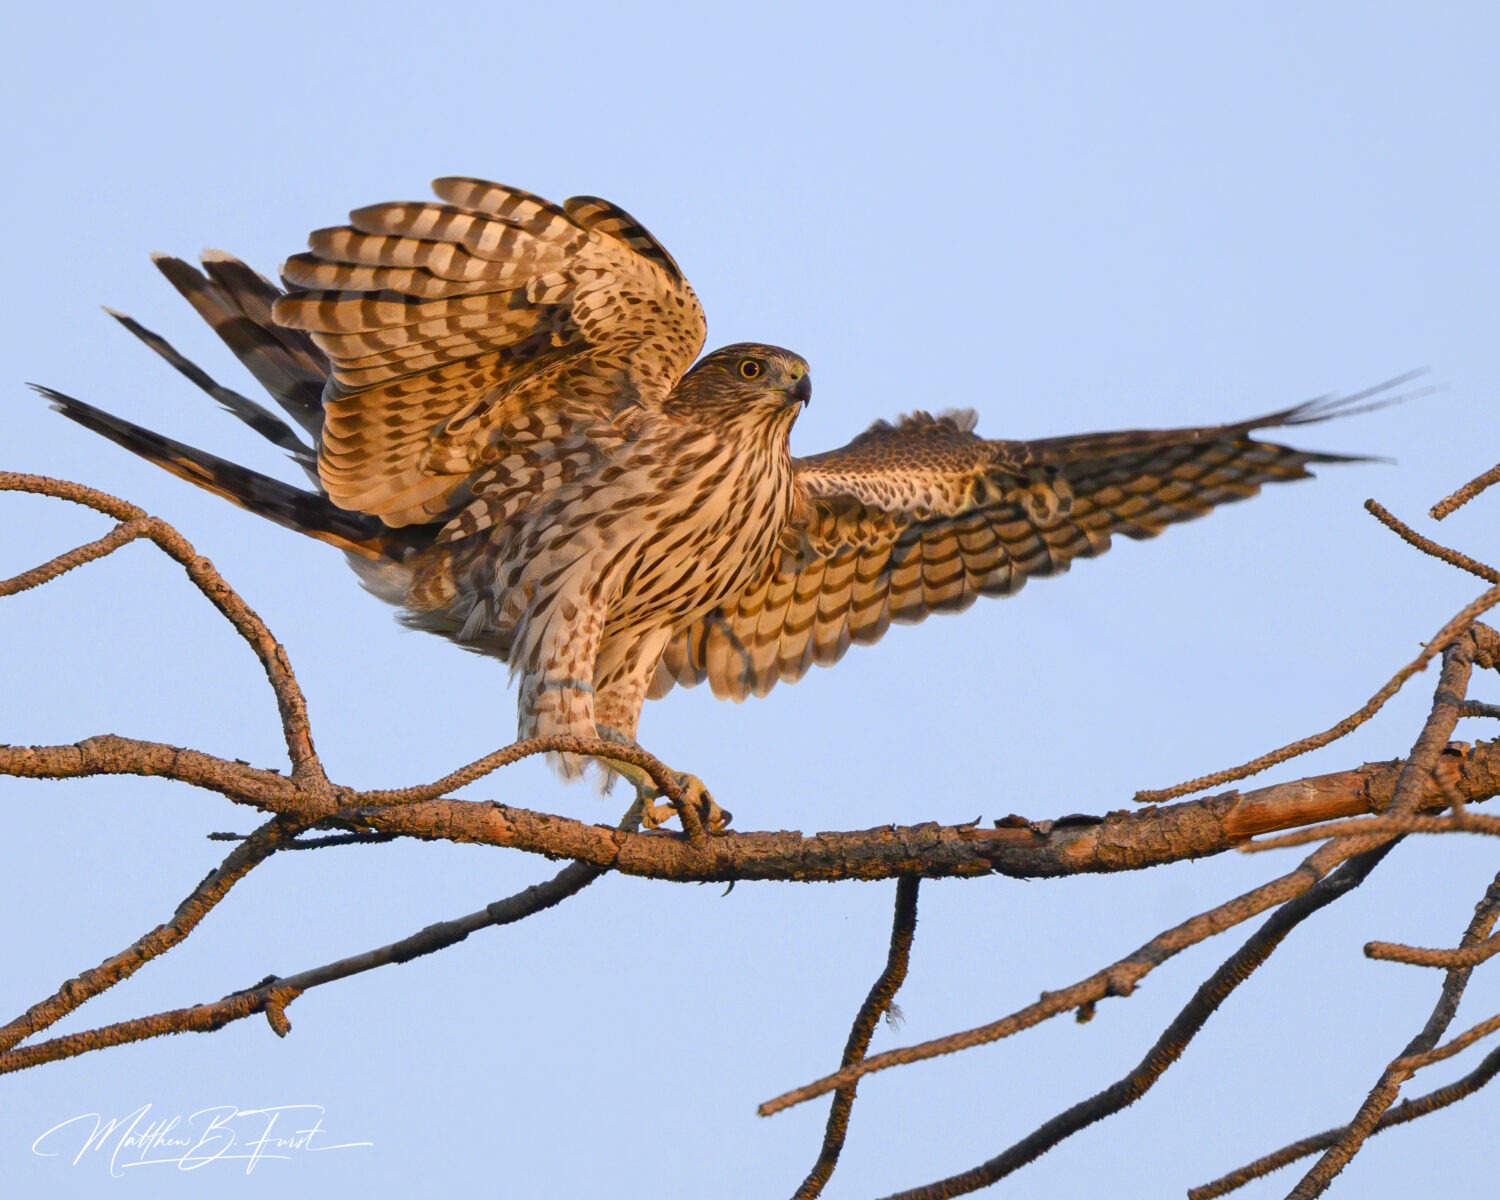
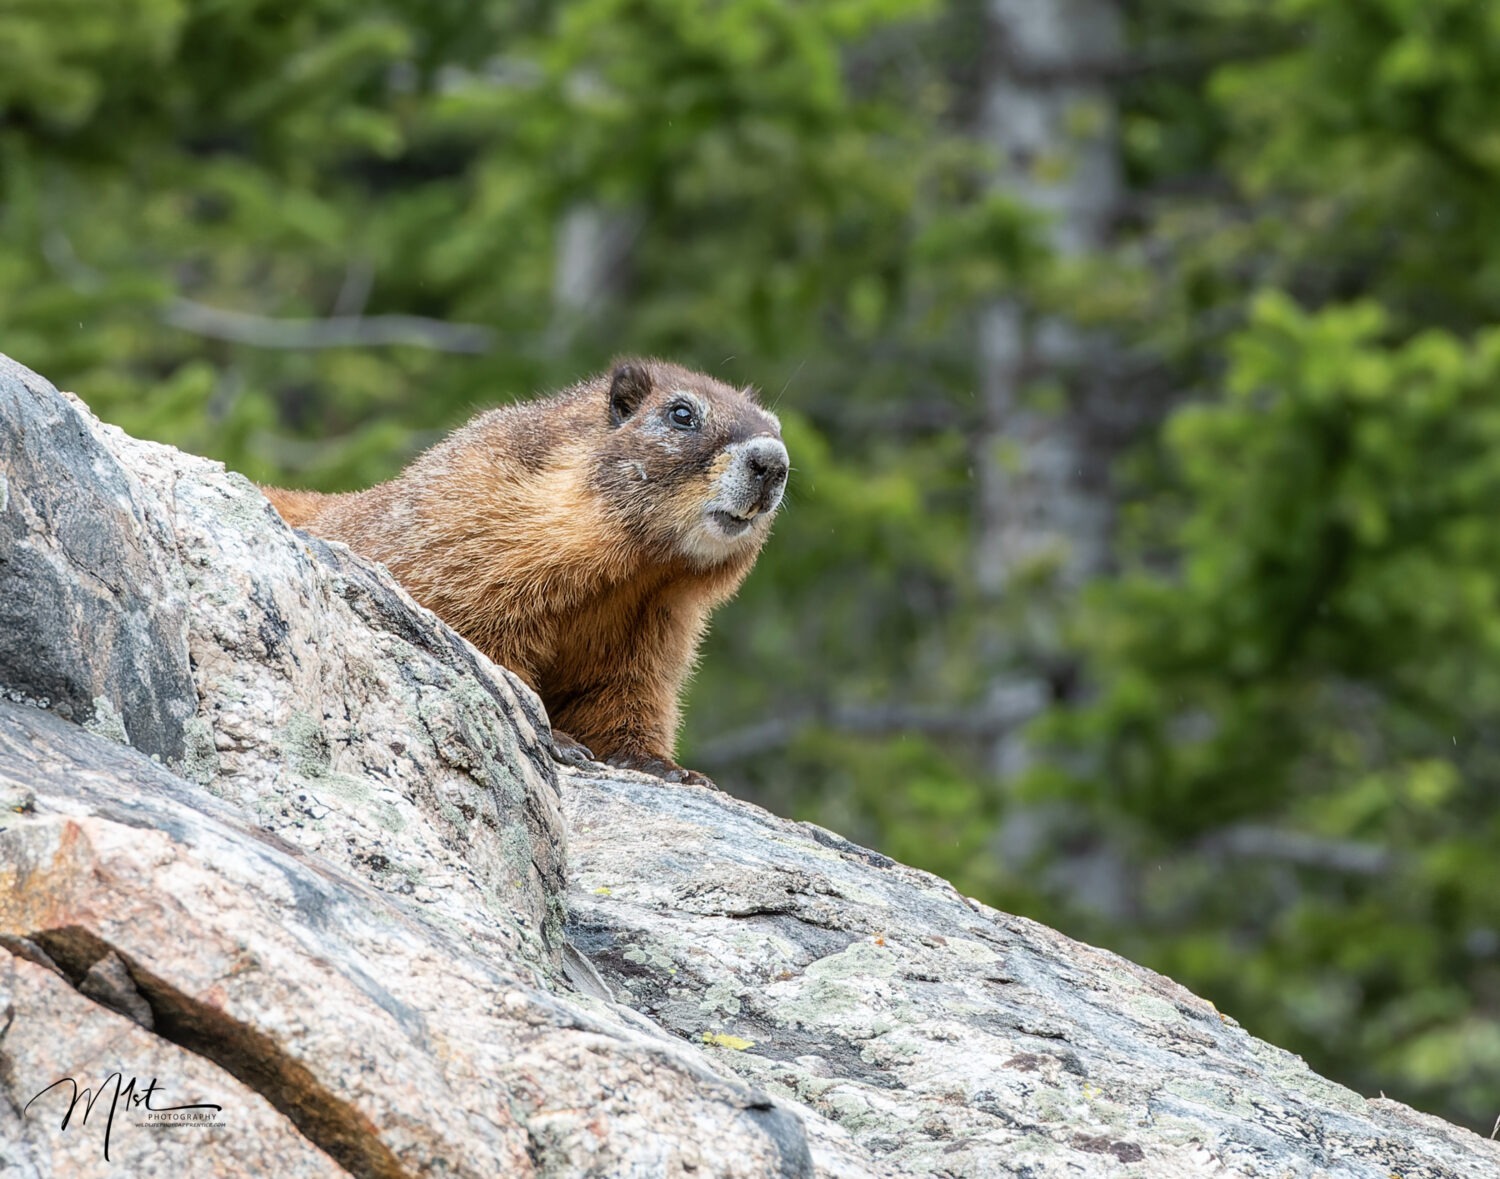
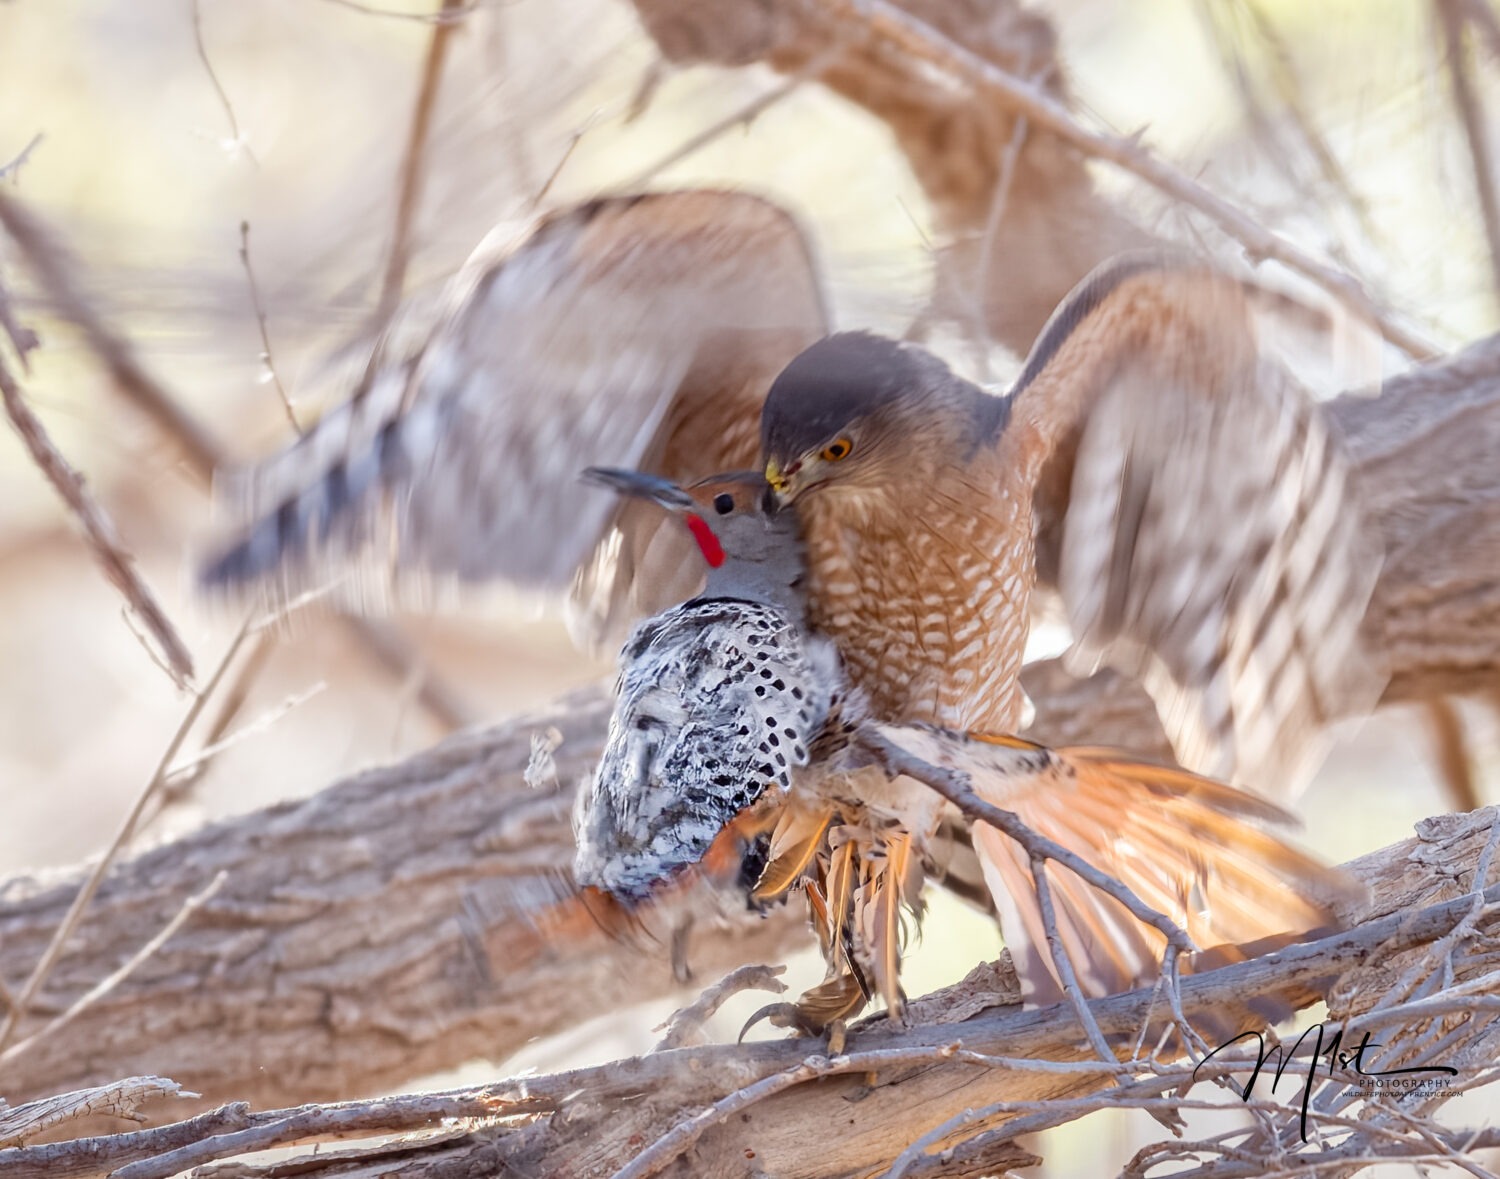
Let’s begin with some basic settings. Using AF-C (Continuous-Servo Autofocus) combined with back button focus and animal or bird eye detection on the Nikon Z9 has transformed how I, as a wildlife photographer, work in the field. AF-C keeps the lens persistently adjusting focus as subjects move, whether it’s a heron lifting from the water or a coyote weaving through grass, so every shift in distance is compensated for in real time. When this is paired with back button focus, the photographer gains total flexibility: pressing the AF-ON button activates tracking, while releasing it instantly halts focus, preserving the selected point for recomposition or moments of stillness. Layer in the power of Nikon’s AI-driven animal and bird eye detection, and the system begins to feel almost telepathic. The Z9’s processor recognizes eyes, even in erratic motion, and locks onto that critical focal plane with astonishing precision. This means the photographer can concentrate on framing and anticipating behavior instead of micromanaging focus. Together, these tools (continuous AF-C tracking, controlled back button focus activation, and AI eye detection) create a fluid, intuitive shooting experience that dramatically improves keeper rates and delivers beautifully sharp, expressive images of wildlife, still or with the subject in motion.
Setting up AF-C (Continuous-Servo Autofocus), back button focus, and animal or bird eye detection on the Nikon Z9 takes just a few steps in the camera’s menu, but those adjustments profoundly change how smoothly and efficiently the camera handles wildlife action. Here’s a detailed walk-through that builds on Nikon’s professional setup guides and field-tested wildlife configurations.
Begin by setting the focus mode to AF-C. Hold down the focus mode button (located near the lower front of the camera beside the lens mount) and turn the main command dial until “AF-C” appears on the top display or viewfinder. In this mode, the Z9 continuously adjusts focus as long as you hold your AF-ON button or half-press the shutter. It’s essential for tracking motion, such as birds in flight or animals crossing uneven terrain.
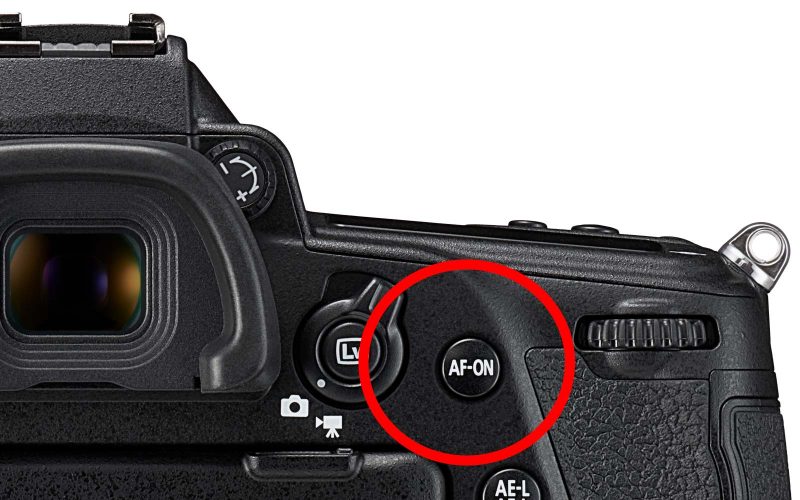
Next, enable back button focus, which gives you full manual control over when autofocus activates. In the Custom Settings menu, go to a6 (AF activation) and select “AF-ON ONLY”. This disables autofocus from the shutter button, meaning the AF-ON button (on the back of the camera) becomes your sole focus control. From now on, pressing AF-ON initiates continuous tracking, and releasing it freezes the focus at that exact distance. This separation prevents accidental refocusing between bursts. It also allows you to easily recompose the subject within the frame while maintaining focus.
Now, turn on Animal Detection so the camera can automatically find eyes, heads, or bodies of wildlife subjects. Access Photo Shooting Menu >AF Subject Detection Options, then select Animal. For bird photographers, newer firmware versions combine animal and bird detection in this setting, offering precise eye recognition even on fast-moving or partially obscured subjects. With this enabled, the Z9’s AI identifies and locks onto the eye or head within your AF-area selection, displaying a small tracking box in the viewfinder.
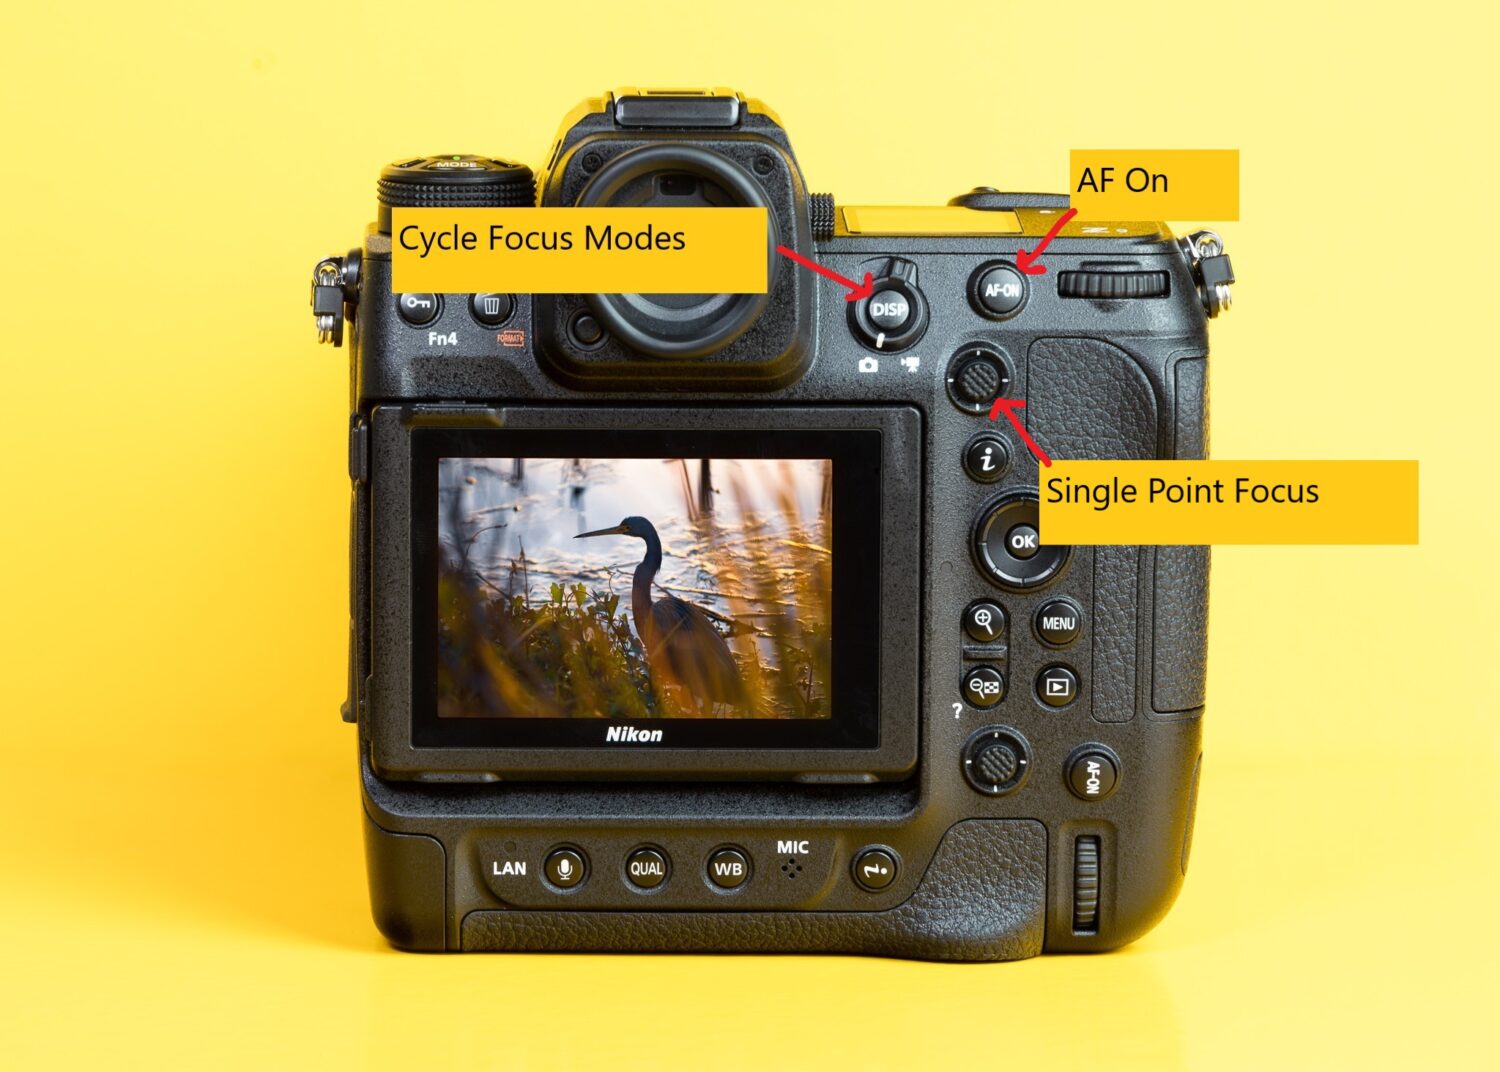
Because no two situations are alike. You’ll want to select a suitable AF-AREA MODE to pair with AF-C and eye detection. In the i-menu, select Wide Area ( C1 or C2) or 3D Tracking; both work beautifully for erratic subjects. Wide-area AF lets you define a zone for bird tracking, while 3D tracking follows a subject across the frame once you initiate focus with AF-ON. C1 and C2 allow you to customize the auto focus areas to better suit your needs, such as a wide thin box for birds in flight. The joystick can be used to move the position of your focus zone. Nikon’s a7 setting, “Focus point persistence,” can be turned on so your last used point remains active when switching focus areas. However, fast action can quickly shift to still, patient observation as an animal pauses. That’s when button customization pays off. I’ve remapped my DISP button to cycle through AF-area modes. All the wide/tracking modes are available. If suddenly the situation changes, I don’t move my hands from their shooting positions or move my eye from the viewfinder, just a quick thumb press on the DISP button, and I’m in the right focus mode for the moment at hand. It’s a simple change, but it consistently allows me to react instantly, rather than fumble with the menus.
The joystick’s center button is my ace in the hole for tricky focus scenarios. I’ve paired it to trigger AF-On with single-point focus immediately, so when a subject is partially hidden, I press and hold the joystick center button, land that AF point on the eye, and capture detail where it matters most. For birds perched in dense foliage and mammals half-hidden in brush that other focus modes may have difficulty locking on to, this simple option is often the difference between a sharp subject and a missed opportunity.
The next problem to simplify is exposure, where art and craft combine. I always use my Z9 in full manual mode, but more recently, I find myself pairing it with Auto ISO and matrix metering. With this setup, I choose the aperture and shutter speed, a wide aperture for blurred backgrounds and a fast enough shutter speed to handle motion blur. I let the camera handle ISO so I don’t lose time or risk missing exposure when light changes. I set an upper limit for ISO in the ISO settings menu to prevent unacceptable noise. Beware, however, that this will prevent the camera from achieving the correct exposure if the ISO values required exceed the limit you have set. I set the camera metering to Matrix metering. With the Z9’s sophisticated scene evaluation, this ensures my subject isn’t lost to blown sky or inky shadows. For the few situations that require increasing or decreasing the exposure, exposure compensation is always there to save the day. I add in +/- EV as needed and trust the camera to keep my highlights and shadows healthy. Remember to reset the exposure compensation after you get the shot where it is needed, as this setting is not automatic and will not reset until you manually change it back. If the situation dictates, you can return to full manual mode by holding down the ISO button and rotating the front dial, this quickly enables or disables auto ISO.
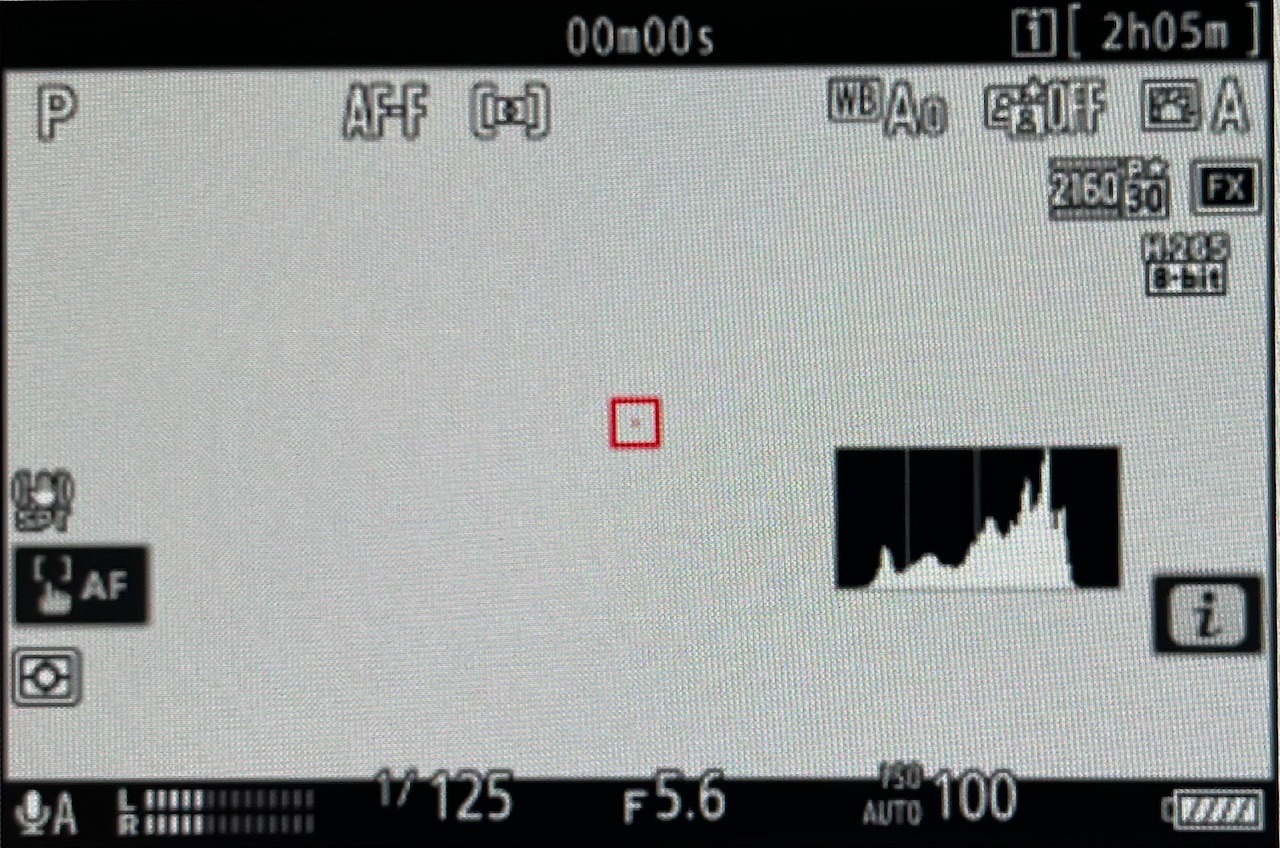
Another simple but very useful change is adding the histogram to the Nikon Z9’s electronic viewfinder through the custom viewfinder display menu, giving you real‑time feedback on exposure as you shoot. With it active, you can instantly see highlight and shadow distribution without taking your eye off the subject, allowing you to fine-tune exposure compensation or ISO adjustments on the fly and capture perfectly balanced wildlife images even in fast-changing light.
If there’s a hallmark of any wildlife setup, it’s readiness for action. For this reason, I keep my Z9 set to high-speed continuous shutter release; 10 to 15 frames per second is my sweet spot. When the moment unfolds, such as a heron erupting in flight, I can capture a burst and pick the perfect frame later, knowing I never missed that split-second of the action. I set the shutter to release only, not release + focus or focus only, so that no shots are missed in the action sequence. I deal with any shots that may not be completely in sharp focus later in post-processing, following the philosophy that it’s better to take an imperfect photo than no photo at all. Unpredictability is the norm in wildlife, and those bursts are gold when it comes to storytelling.
All these changes work well for me and create a seamless experience in the field. Each button is remapped to a given purpose, becoming an effortless extension of my intent. My thumbs toggle focus modes, my forefinger works the shutter, and my eye stays locked on the wildlife, never the menus. The Z9 becomes invisible; all that matters is watching for light, gesture, and behavior.
Many of the core shooting settings on the Nikon Z9, such as AF-C continuous focus, back button focus, exposure modes, and subject detection, operate almost identically to those on Sony and Canon’s flagship models, differing mainly in menu location or terminology. It’s easy to translate these controls across brands, as the underlying photographic principles and functionality remain fundamentally the same.
Rather than a static list, this is a living setup. Over seasons, I’ve added shortcuts, refined configurations, and adapted to new firmware updates. That’s the real strength of modern cameras like the Z9, the opportunity to mold the camera to the photographer, letting experience shape every decision.

For those venturing into the wild with the Nikon Z9, I’d urge you to build muscle memory with these customizations. Practice switching focus modes with your DISP button; get comfortable with instant single-point override using the joystick; rely on back button focus and trust the AF-C engine. Embrace manual exposure paired with Auto ISO for the confidence it provides in shifting light. Use matrix metering as your baseline, and don’t be afraid to utilize exposure compensation when indicated.
And finally, shoot in high-speed bursts when action peaks, but don’t forget the artistry in the still quiet moments, where precise focus and careful composition matter just as much. The Z9, when set up with intent and experience, truly becomes not just a piece of gear but an indispensable tool in the creative process.
By following these steps, not as rigid rules but as adaptable habits and techniques honed over time, you’ll find your keeper rate climbs, your stories deepen, and the camera begins to disappear into the background, leaving only the animal, the moment, and the image.